
Last UPDATED:
Take back control of your farm, greenhouse, or garden data.
The promise of smart agriculture brought visions of connected fields and effortless monitoring. But for many, that promise turned into a complex web of expensive subscriptions, locked-down hardware, and lost ownership of your own data.
At EnviTronics Lab, we believe in a different approach. We focus on the basics: privacy, ownership, and simplicity. Our goal is to help you build a truly private, subscription-free monitoring system with hardware you can understand, repair, and own outright.
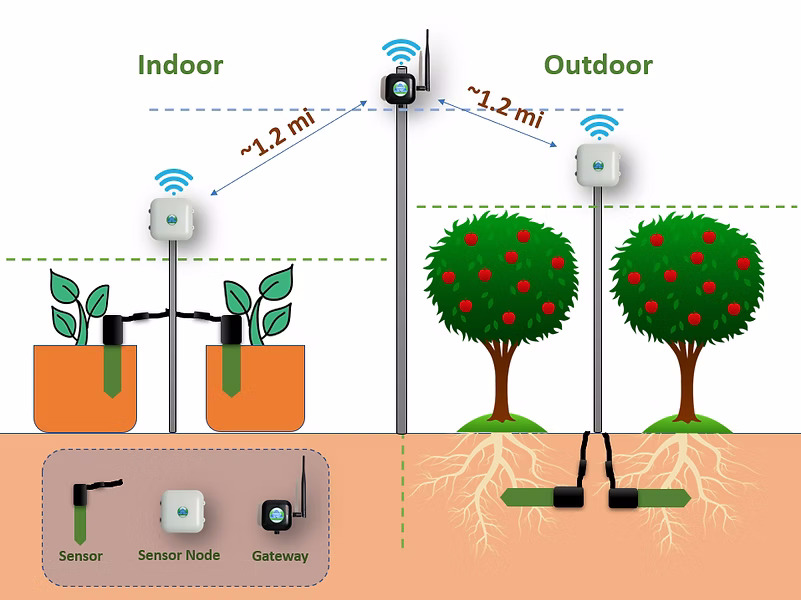
In this step-by-step guide, we’ll walk you through exactly how to assemble and configure your own long-range wireless sensor network using our open, modular components. You’ll create a robust “star topology” network for your home garden, grow room, greenhouse, or orchard, where you control every byte of data.
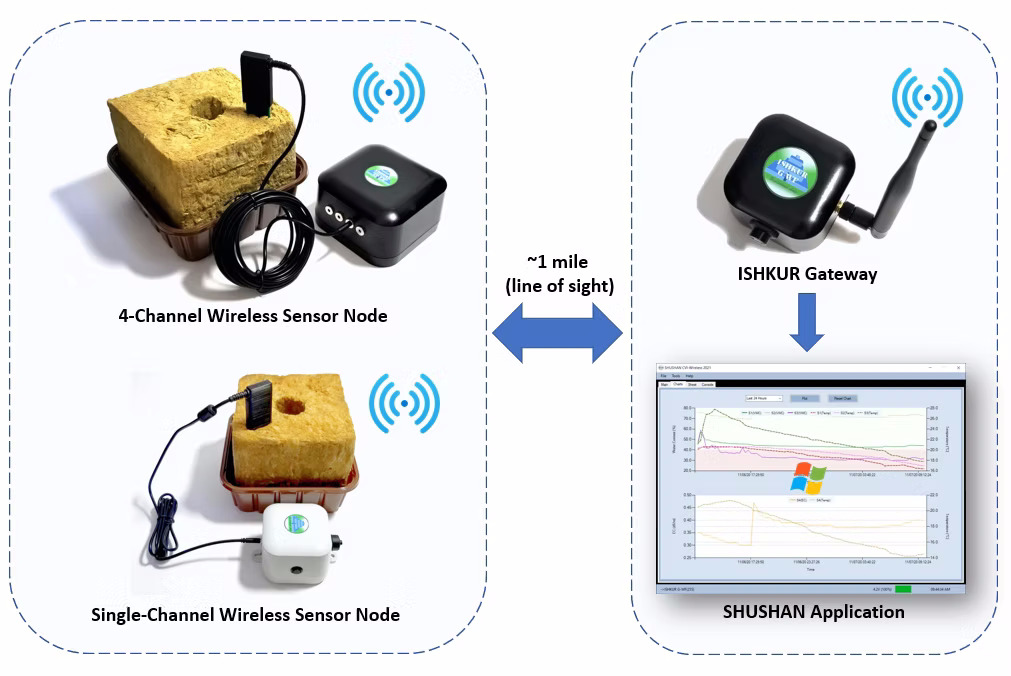
You will create a private wireless network where:
The beauty of the system is its plug-and-play core. Once the hardware is configured, you simply place the nodes in the field and turn them on. The network builds itself.
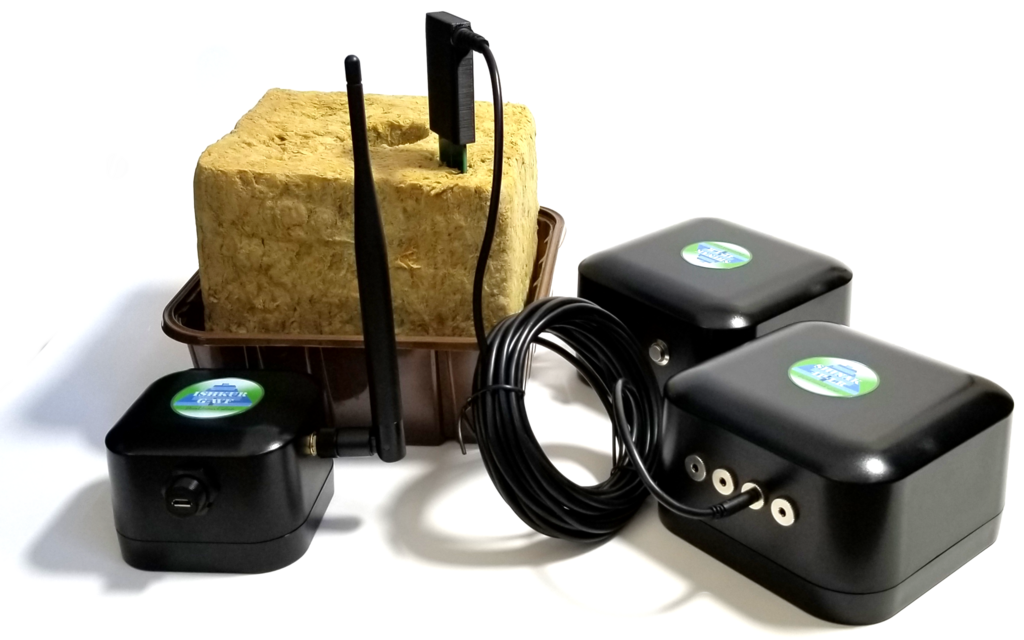
You can start small and expand. At a minimum, you need:
💡 Pro Tip: Start with one node and a few sensors. The system is designed for easy expansion—the gateway automatically detects new nodes as you add them.
A few minutes of setup ensures a smooth, reliable network. All configuration is done using the free SHUSHAN CVI-Wireless software. We strongly recommend downloading and skimming its manual first.
The Two Key Numbers:
The Goal: Assign a unique Device Number to each node, and ensure every device shares the same Gateway Number.
Part A: Configure the ISHKUR Gateway
1. Connect the Antenna: CRUCIAL. Always connect the external antenna before powering on the gateway to prevent damage.
2. Power & Connect: Use the provided micro-USB cable with a powered USB hub (connecting directly to a computer port is not recommended). Open SHUSHAN CVI and connect to the gateway via USB.
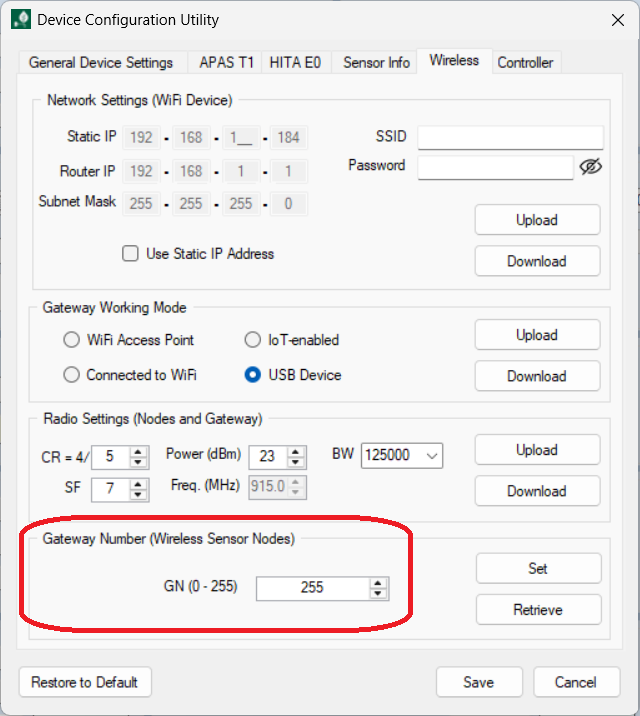
3. Set Network Mode: In the software (Tools > Device Configuration Utility > Wireless tab), set the gateway's working mode.
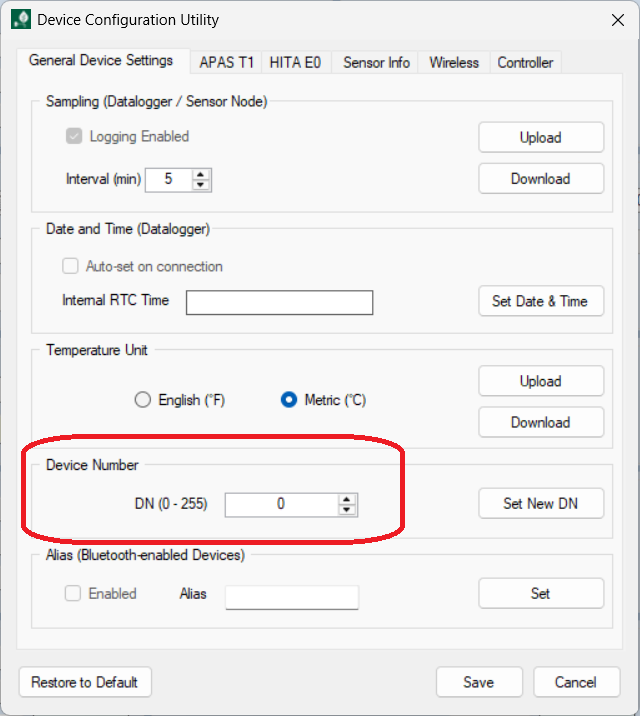
4. Set the Gateway Number: In the General Device Settings tab, note the gateway's device number. In the Wireless tab, confirm its Gateway Number (default: 255). All your sensor nodes must be configured with this same number.
6. Finalize Connection: Disconnect USB, power the gateway normally, and connect to it via WiFi from the SHUSHAN CVI software using its IP address.
1. Fully Charge the Node: A 4-channel node can take 24+ hours; a single-channel node about 5 hours.
2. Connect & Configure: Turn the node on, connect it to your computer via USB, and connect in SHUSHAN CVI.
General Device Settings. Default is 15 minutes. For most applications (moisture/EC), 60 minutes is ideal and greatly extends battery life.3. Apply & Restart: Disconnect the node from the computer and power cycle it (turn off and on) to ensure it saves settings and enters its low-power operating mode.
1. Install Sensors: Correct sensor installation is 90% of success. Follow the guides for your specific sensor (e.g., APAS T1 Installation).
2. Place Nodes & Gateway:
Tools > Settings > Notifications) to enable email alerts.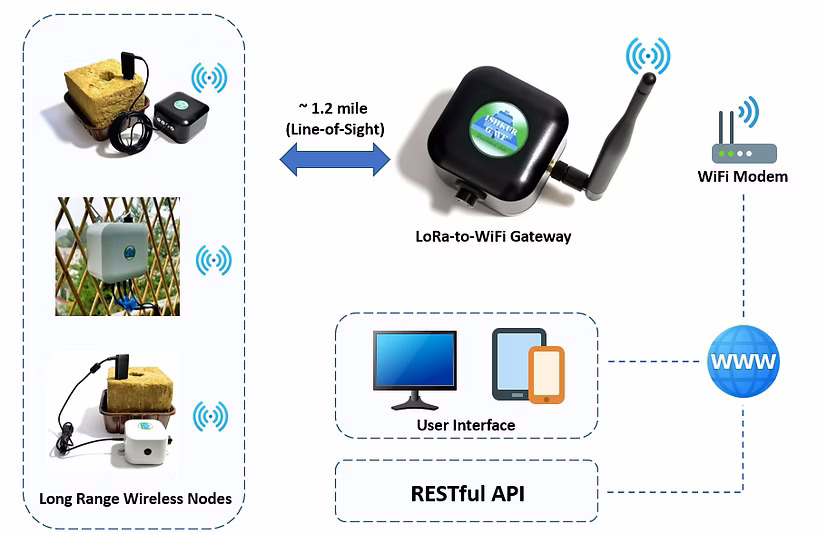
You’ve now built a monitoring system that is yours. There are no monthly fees, no data locks, and no proprietary barriers to repair. This is sustainable, practical technology designed to empower your decisions.
Need help? Communication is key. Please reach out with any questions during your setup.
Ready to see it in action? Explore the core components of this system:

Copyright 2026 EnviTronics Lab